Showing posts with label miniature. Show all posts

Wednesday, 3 October 2012

Wamped 3!

The details have been released, so get painting for one of the biggest online painting competitions!
Details can be found over at the Wamp website, with a handy link right there ay the top of this blog. It's free to register and enter, and there are prizes for winners, runners up, an overall best in show prize, plus spot prizes and sponser prizes!
The best paint job does not always win, vision and idea play a part in the judging so really anyone can win.
Hope to see you there!

Tuesday, 31 July 2012

Painting Tips: Thinning your paints


Every one has done it. You have opened that paint pot, dipped your brush in, put it to model, and all the detail just disappears under a nice thick layer of paint, and you panic. I do it regularly, think I only need a spot, and then mess my model up.

What are the benefits of thinning your paints? You will not lose any detail in a model with correctly thinned paints, no matter how many times you have to go over the area. The paint will also dry a lot smoother, and there will be no brush strokes in the paint.

So what do you do to think your paints?

Method 1: Basically, you need a palette, a brush some water and the paint. Get some paint on your brush, and put it on the palette. Then using CLEAN (cannot stress that enough) water, use add it to the paint off the brush. Generally, one brush of paint to two brushed of water is where I want to be personally. Play around to get your own ratio. We are looking for paint the consistency of single cream, maybe a bit more watery that that.

Method 2: Go out to your local model shop, and see if they sell Vallejo Game Colour Thinner. This is basically a acrylic medium, and comes in a wonderful dropper bottle. Put your paint on a palette, add one drop of thinner, mix, add more if needed. Still looking for the single cream consistency, and usually (for me at least) 1 paintbrush of paint is thinned by 2 drops of thinner.

Now clean your brush before you start to paint, to get off excess paint, as any excess will defeat the point of watering down the paint. Before you put brush to model, wipe off excess paint on some kitchen towel.

You will notice that the paint may need another coat to get a good, solid covering on the model. This is OK, in fact wanted. 5 thin coats of paint is much better than 1 thick coat of paint. Yes it pushes painting time up, but also the paint dries a lot quicker like this, and you can see the colours emerge, and you have a lot more control over the paint.

One more method I sometimes use, especially with GW paints, is to thin down the whole pot at once, so you can paint out of the pot. Be careful with this, you don't really want to over thin the paint, as you can still use a palette/thinner later. I have used this on quite a few of my GW paints, they last longer and I don’t need to waste time thinning every colour every time I want to use them.

Sorry for the lack of pictures, I did take some but they really did nothing. I will make a video over the next day or so to show consistencies.

Thursday, 26 July 2012

Miniature Painting: Which Primer?


More to the point, what colour? Black, grey or white?

There are many people who swear by using a certain colour for their primer, and just as many who probably have never given any thought into it. In my (ahem..) quest for painting perfection, I have used all three, and settled on grey as my colour of choice, but I also know when to use the other colours.

Black will generally produce a much darker, grittier feel to a finished model, with colours on top being muted and not as bright. Black also creates a “auto shade” effect, where the recesses will be darkest on the model, usually enough to make you only push the highlights.

Grey produces the most realistic (in my opionion) colours. It still creates a little amount of auto shading, but also pushed highlights a little as well. It takes longer to work with, due to you having to go back and finish the shadows as well as the highlights when the base coats have been completed.

White will create the brightest finished model, and has a “auto highlight” effect. There will be very little shading on the model, so you will have to do and do these yourself, but the highlights will be very prominent from the start.

All three have their followers. Black I use when I am batch painting or speed painting, as it leave things like guns and parts you don’t paint black, and takes to a nice dry brush easily. Grey I use for one off models, such as character models. The paint takes well to the grey, and helps the model stand out a bit better when all the other models are on the table, due to you starting on a lighter base colour. (However, I am finding myself using grey a lot more for everything recently). White I very rarely, if ever use. I just don’t like how bright it makes the model, which to me is very unrealistic. I would only use white one something such as Eldar in WH40k, as these are very bright models when finished.

Here is a little example (excuse the extreme blur on the second photo... but it is only the colour we are looking at so I didn’t retake it.)


The first picture is just the base undercoats. The second is the models painted with a base coat of Mordian Blue foundation, mixed 1:1 with some game colour thinner. You can see the difference, black on the left, which is much darker with much more prominent shadows, and white on the left which, to me, the blue looks way to happy. The middle grey, is perfect to my eye, looks very close to what the paint in the pot looks like.

So there you have it. Use black for quick jobs, grey for everything else and white on special occasions. OK that just my opinion, but next time you reach for that can of spray primer, as yourself, are you using the right colour for the job?

Tuesday, 24 July 2012

Painting Miniatures: Paintbrushes


Painting miniatures is a skill that can be learnt. Of course it helps if you have an artistic flair, but it is one of those skills that CAN be learnt, and learning how to do it well takes a different amount of time for everyone.

One of the main stumbling blocks that I myself came across was paintbrushes, and which one to use and when. I have been through many brushes of almost every size, and have come to the conclusion that I need 3, no more and no less. I think this will apply to most people who just paint for the tabletop and themselves. If you are painting for competition or display purposes, all the sizes will have a purpose, but for the average gamer/painter, I believe that you only need 3.

So which ones? Well, I have a size 000, for detailing, a size 1 for everything else, and a old Games Workshop large dry-brush for, well, dry-brushing. I paint everything from large aircraft to the smallest Grot with these brushes.

The size 1 I use for just about everything. Get a brush that will always come to a good point (personally I use Winsor and Newton, expensive granted, but ALWAYS come back to a point.) With a brush with a good point, no matter what size it is, you will always be able to do detail, and be able to switch in and out of doing large areas, such as armour, back into doing wristbands and necklaces with ease.

The 000 is used for those hard to reach areas and other things, like eyes and gun scopes. That’s all that’s used for, don’t even think to use one of these for flat surfaces, you will get brush marks and be there painting for a long time.

The large dry brush I use is defiantly at the end of its useful life. Any large stiff bristle brush will do the job for dry brushing though, even other brushes that don’t keep the tip can be used for dry brushing, as it kills brushes fast.

The most important aspect however, I practising with a size 1 brush. The size of it at first may seem prohibitive, making you think that it could never be used for detail, but when you get used to using just the tip of the brush with different pressures, you will be amazed at what can be achieved with such a large brush.

Practice, practice, practice. Paint to your best standard you can, and other times just go out and buy a cheap model and just paint. Don’t care too much what you do to this model, keep it fun. Get good brush control and the rest will come.

Monday, 9 July 2012

Painting a Ork Dakkajet


So I painted a Ork Dakkajet this weekend. I have wanted to paint one of these since GW released the model, so decided what the hell, lets do it. And was I glad that I did, this was a fun model to paint!

So from the beginning, here is how it comes out of the box:
Only three sprue’s, but these are packed with fun little bits of detail and items on them. All was cast well, no problems there.

Putting it together was a breeze, but watch those wing supports! I put them on upside down to begin with, which gave me a headscratch moment when I tried to connect the exhausts.

As I have found with most GW instructions for models, its best to use these as a example of how to put these models together, not the be all and end all. A little experimentation can yield some simple yet nice conversions straight out of the box.

It took about 45 minutes to put it together to this stage.
Note the pilot and weapons are not built at the moment, this allows for easier painting of the main aircraft.

I under-coated it with Tamiya Grey Primer, then put a base coat of Humbrol Crimson down over the top.

After that, I just had fun with this model. I used a variety of different techniques to get the battle damage in place, and played around for around 3 hours until I liked it. (One note, Humbrol crimson spray is a pain to paint over. It has a very gloss finish, and shows up every brush stroke on top of it. Lesson learnt, next test will be with a coat of matt varnish over the top before painting.)


Like I said, I had some real fun painting this, and it is going into the commissions folder to show people what I can do. For now, this is on ebay. Go and check it out if you want, maybe you might even want it, I don't know. More of these can be painted, so if you want a squadron painting, head over to facebook.com/farlandsgames and drop me a message!

Friday, 6 July 2012

Warhammer 40000 6th Edition – First Impression


I just received my copy of the new rulebook (I know, a bit late, but there were some supply issues) and have decided to share my initial response.

The book itself is gorgeous, big and heavy. The paper is thick, and the printing is impeccable. And this is only the normal version, I would love to get my hands on a collectors edition.

As with most of the GW rulebooks, the rules come first in the book, followed by 300+ pages of background, missions, hobby related items and reference tables. I have yet to read through the 130 pages of rules yet, but a few new rules such as mystery terrain and artifacts really stood out on a quick flick through.

There are a lot of pictures of beautiful boards and army’s in this book. I think maybe to many. I do believe there should be two versions you can buy, this version and an version with just the rules. Yes there will be a A5 rulebook in the new box set most likely, but the option to get it on its own would be nice, and most gamers would have both anyway.

Overall, I was very impressed with the presentation of this book. I cant comment on the rules, there will be another post soon dicussing them, and only time will tell if they stand up. If you have a spare £45 knocking around I would recommend getting this if not for just the pictures and story alone.

First impression presentation: 9.5

Monday, 2 July 2012

Paint Planning


As I sit here waiting for my copy of the new Warhammer 40000, I decided to have a little chat about planning when painting.

Why is it important to have a plan and stick to it?

Most of the miniatures that we paint all have some sort of regimental cohesion, such as Ultramarines being blue and gold, Blood Angels being red, yellow and orange, and Imperial Guard mostly being greys and greens. I am guilty myself of starting a army project, finishing it, and all the models look different, down to the actual main colour being different. This has come from a lack of planning, using different colours, and results in a disjointed look to the army.

How have I got around this?

Basically now I make a list at the beginning of each project. I write a rough idea of each stage of the paint job, what colours go where, even down to the time taken for each stage. I then take a look at what paints I have. If I have less than half a pot/bottle left, I go out and get a new pot/bottle. I do this as there is a variation between each pot of paint, some being stronger colour, some being weaker, even within the colour range. I hate starting, running out, and getting a new pot that is darker or lighter. Here we go to a earlier point, it breaks the cohesion of the army.

I then paint a test model, just to see if the list I have written works, and I make amendments to it as I go. It becomes the final list, what I work to on every model.

I usually paint in batches of 10, keeping the models moving like a conveyor belt. Base coat all of them, and by the time I have completed model 10, model 1 is dry enough to be worked on again. I have found this also helps cohesion within the squad, and keeps them looking even.

So we get all the models in each squad looking the same colour wise, and all the models in the army are the same colour wise. In my eyes, it makes a much better impression when people see it, and looks better on the table.

Give it a try, make a list of the stages that need to be done, and stick to it. You might be surprised!

Wednesday, 25 April 2012

Talisman 4th Edition Review


I first played this game many years ago as a child, when it was in its third edition. Back then it was a great game, that I could play with both my family and friends, and it will always have a dear place in my heart. So how does the Fantasy Flight Games 4th reprint stack up?

This game oozes presentation. From when you first pick up and feel the weight of the box, you know you have a great game in your hands. This carries on when you open up the box for the first time, and see all the cards and the miniatures, and that board.

The board is huge, with beautiful artwork all across it. You can play this game many, many times and still see new things on the board, things that you missed the last time. All the other componants are wonderful aswell, with nice finishes on all the cards, and all the plastic pieces just feel right.

The rulebook is the usual fare, and I feel way to long for this game. It makes the game feel complicated when you first read it, but play the first game, and you will see how it all fits together seamlessly.

The game plays really smoothly, and even with brand new players, once you have played the first turn, every one will know what to do. Gameplay is simple: Roll a dice, move your character that amount of spaces left or right around the board, and do what the space you land on instructs you to do. Usually, it will be draw a amount of cards, which you then follow the instructions. These can range from fights with monsters, to items that you can pick up or special events that affect everyone on the board. Then its the next players turn to do the same.

The whole idea is to build your character into a strong warrior and work your way into the center of the board, where the Crown of Command exists. At this point, the character with the Crown of Command kills everyone and wins. It sounds easy, but as you work your way into the center of the board, spaces get harder, as do the monsters that you encounter. Couple that with the fact that when you make a dive for the center, you become a target for everyone to get.

I have found that this game takes about one hour for each player playing. So a four player game can last four hours, but don't let this put you off, that time will fly by. It really is a fun night in game, so grab your friends, get some drinks and snacks and see where this game takes you. The tales that can be told from playing this game are wide a varied, and peoples misfortunes will make you all fall around in laughter. Take for example from a game I played. We had a hapless druid, who on his turn drew the mighty dragon to fight. Having not a chance, he still fought it, and lost. Play went around, and he swiftly moved on, only to draw a demon, the most powerful enemy in the deck! Needless to say, his character did not last long, and proceeded to get drunk in the tavern (it had been a rough day).

So, do I like this game? Yes I do, and so does everyone I have introduced to it. This definatly goes in my top 5 games of all time. So get this, you will not regret it one bit.

Rating: 9.5/10


Friday, 6 April 2012

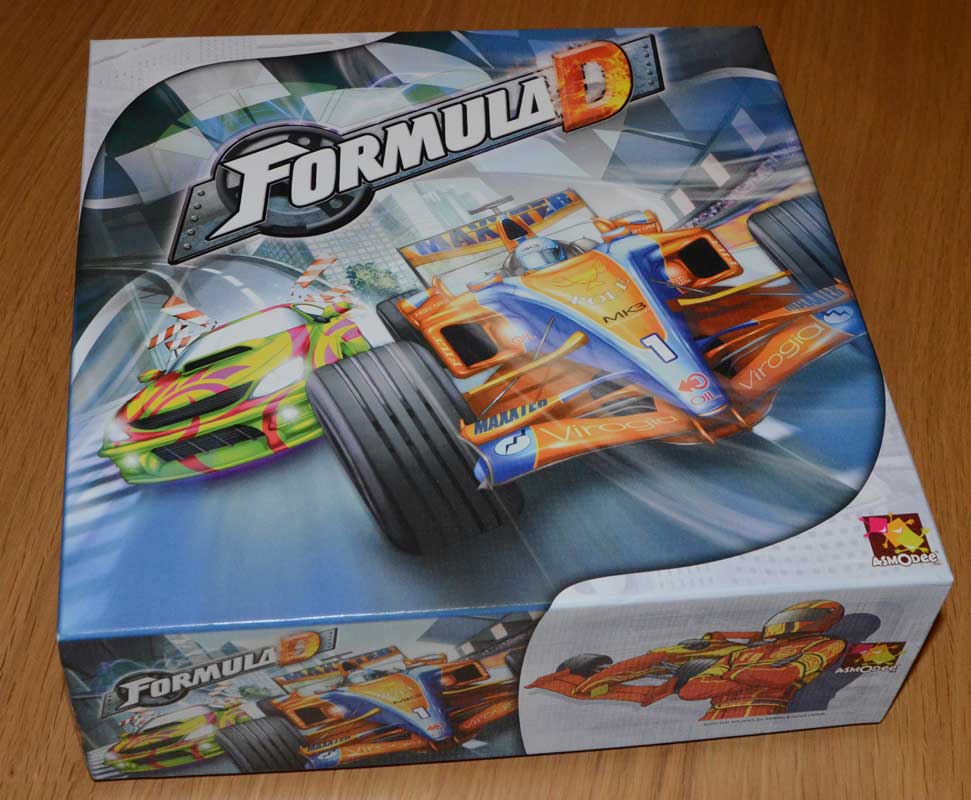
Formula D review


This is a great game. I am just going to come out straight and say it. But what makes this such a great game?

The components are good. The board is BIG, and comes in two sections and, the artwork really captures the theme nicely.


The only problem I have with the board is that it won't lay completely flat on the table, this is to do with how its folded. But it is double sided, so two maps on one set of boards is a good thing.

The cars are nice and functional. There’s not a lot of detail on them, but with different colours and designs its not difficult to see which ones are which.


Another nice feature is the gearbox controls for all the cars, which I think are a nice touch, and also complements the theme perfectly.


These show which gear you are in and how much wear (which is damage) your car has taken. These cards are also double sided, with the basic layout on one side, and the advanced layout on the other side.

What makes this game is the way it works. You movement is determined by the roll of a dice, and each gear has its own dice and, number range attached to it. In first gear you can only move only 1 or 2 spaces, all the way up to sixth gear, which is a 30 sided dice marked 21 to 30 (!), where you can cover some serious ground. 


Corners are rated 1 to 3, which determine how many times you need to stop in each corner to prevent damage or even destroying your car. You can blast straight through corners rated 1, but take damage equal to however many spaces you overshoot the corner by. On a 2 or 3 stop, you will wreck your car unless you have stopped one or twice (respectively).

And that’s really all there is. There are some simple rules that control how the cars move around, which are all pretty intuitive. In the basic game, all your wear points are together, and once you hit 0 you wreck the car. In the advanced mode, your wear points are split up, into axle, wheel, engine and other parts of the car. This means you will have to start really thinking about those corners, as you have less points until you become a fast moving fireball.

The flip side of the map depicts a street race, where a whole new set of rules can be used. You can drift around corners, get shot at, and take damage from rubble on the road. The track is much tighter, and feels a lot different from the Monaco F1 track. Here you can also use drivers, each with different damage stat's and special abilities. Overall, this makes for a different style of play.

I feel that this whole game can be easily taught to anyone. If they understand car races (i.e. reach the finish line first) then the gear mechanic will be easily understood, and strategies are easily learnt. The first lap with someone who has never played before can last around an hour, speeding up at the end. I played games of this with people who had never played, and we were doing three lap races in about a hour and a half after the initial lap.

The rule books are laid out in a nice and neat way. The rules are explained in a nice and simple way. There are two rule books that come with this, a beginners book and a advanced racers book, and are A4 sized. 


The advanced book builds upon the beginner book in a nice way, adding rules that you choose.

This also lends itself to a league table. Be it with the family or game group, an lot of friendly competition could be achieved if played one or twice a week with a leader board being updated.

I like this game a lot as I have already mentioned. Its easy to play, doesn't take to long and has moments of intense excitement involved. It has been well expanded with tracks available, and has a good online following, with fan made maps and variants easily available.

Rating 7.5/10